React Most Wanted is a boilerplate project that uses react, redux and firebase. It has all "Most Wanted" features you need for a full functional Progressive Web Application. The best part is that it is based on to main parts:
- CRA - Create React App which is a very minimalistic boilerplate for react projects but with all webpack, babel and other tools and libraries setup for you. It is maintained by a great team from Facebook
- rmw-shell - The part that goes further than CRA. This one has all the main parts that a new application needs. The best about it is that it gets updated even when you have started your new project and added new parts to it. That way we can ensure that all projects get the needed updates.
What is a Progressive Web App?
A Progressive Web App is:
- Progressive - Works for every user, regardless of browser choice because it's built with progressive enhancement as a core tenet.
- Responsive - Fits any form factor: desktop, mobile, tablet, or whatever is next.
- Connectivity independent - Enhanced with service workers to work offline or on low-quality networks.
- App-like - Feels like an app, because the app shell model separates the application functionality from application content.
- Fresh - Always up-to-date thanks to the service worker update process.
- Safe - Served via HTTPS to prevent snooping and to ensure content hasn't been tampered with.
- Discoverable - Is identifiable as an "application" thanks to W3C manifest and service worker registration scope, allowing search engines to find it.
- Re-engageable - Makes re-engagement easy through features like push notifications.
- Installable - Allows users to add apps they find most useful to their home screen without the hassle of an app store.
- Linkable - Easily share the application via URL, does not require complex installation.
This codelab will walk you through creating your own Progressive Web App, including the design considerations, as well as implementation details, to ensure that your app meets the above key principles of a Progressive Web App.
What you will build
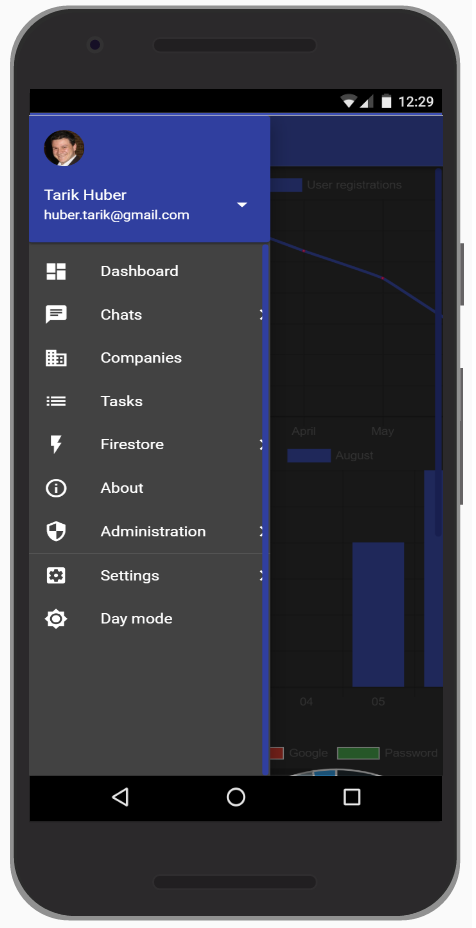
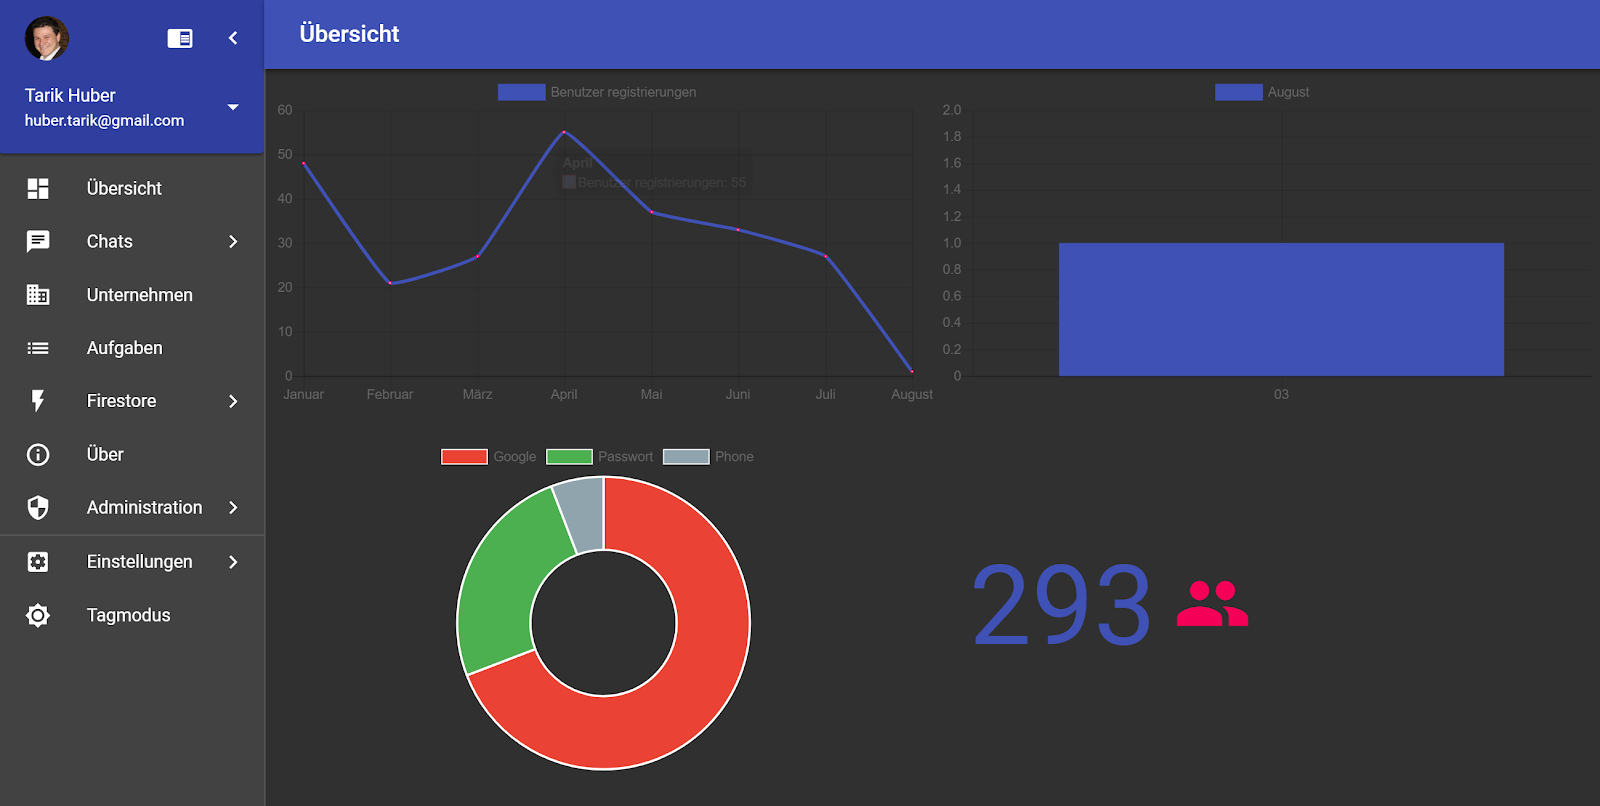
In this codelab, you're going to build a new React Most Wanted web app using react, redux and firebase. Your app will:
|
|
What you'll learn
- How to initialize a new project using the custom CRA scripts from "rmw-shell"
- How to set it up with your own firebase project
What you'll need
- A Firebase project
- A text editor
This codelab is focused on setting up a new React Most Wanted project. Non-relevant concepts and code blocks are glossed over and are provided for you to simply copy and paste.
Run the custom script
Rmw-shell has a custom CRA script that makes the first step extremely easy. Just run this command in your CLI:
npx create-react-app test-app --scripts-version rmw-react-scriptsThis command will need some time to finish. It will install all needed npm modules and add template files for our new project. This depends on your network connect and device specs.
After the script is done you should see something like this in your console:
Success! Created test-app at C:\Users\TH\Desktop\test-app
Inside that directory, you can run several commands:

  npm start
    Starts the development server.

  npm run build
    Bundles the app into static files for production.

  npm test
    Starts the test runner.

  npm run eject
    Removes this tool and copies build dependencies, configuration files
    and scripts into the app directory. If you do this, you can´t go back!

We suggest that you begin by typing:

  cd test-app
  npm start

Happy hacking!
Start your application
This is already the point where we can start our application and see how it looks like.
For that we need to go inside the project folder with this command:
cd test-appTo start the application we then run this command in the project folder:
npm startAfter that should see this in your console:
Compiled successfully!

You can now view test-app in the browser.

  Local:            http://localhost:3000/
  On Your Network:  http://192.168.178.95:3000/

Note that the development build is not optimized.
To create a production build, use npm run build.
The browser should automatically open a new tab with the address localhost:3000
How are the Firebase configs organised
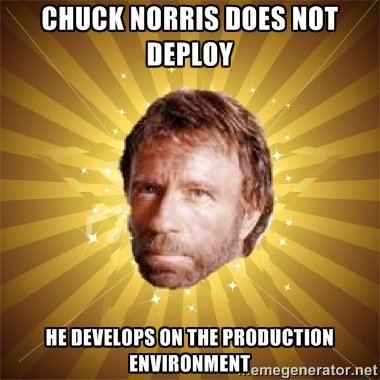
RMW is by default organised to have a production and development mode. Reason for that is that we are not "Chuck Norris" and we should never ever develop with production data.
To make the project work with Firebase we need to setup some configuration in the project code itself and in our CLI. In both settings we will define dev and prod Firebase settings.
The settings in the project code define which Firebase project to use when running in development mode (while running the project locally) and which in production mode (while running the build for deploy). With the CLI settings we control to which project we upload our hosting, database rules, firebase functions and everything else related to Firebase.
The template project is adjusted to work without changing any configs. It uses as default the Firebase project react-most-wanted-dev. That doesn't mean that you have control over that project. You can just start it in development mode. To deploy something to it you would need access for the Firebase project. The separation to dev and prod separation explains why the data you see while running the project locally and those you see on the deployed production version.
Firebase preparations
Before we do anything else we need to create here https://firebase.google.com/console/ 2 projects on Firebase. One for development and the other for production.
Before we can start working with the Firebase configuration on our CLI we need to install the Firebase tools for our CLI. To do so we run this command:
npm i -g firebase-toolsThis will install the Firebase tools for our CLI. Now we can login to Firebase over the CLI with this command:
firebase loginAfter logging in over the prompted browser window and your google account you should see something like this in your console:
Waiting for authentication...

+  Success! Logged in as huber.tarik@gmail.com
Now we are ready to setup our Firebase configuration.
Changing configuration in the project code.
The Firebase configurations we need to change in the code are stored in our project on this path src/config/config.js and look like this:
import getMenuItems from './menuItems'
import locales from './locales'
import routes from './routes'
import themes from './themes'
import grants from './grants'

const config = {
 firebase_config: {
   apiKey: 'AIzaSyBQAmNJ2DbRyw8PqdmNWlePYtMP0hUcjpY',
   authDomain: 'react-most-wanted-3b1b2.firebaseapp.com',
   databaseURL: 'https://react-most-wanted-3b1b2.firebaseio.com',
   projectId: 'react-most-wanted-3b1b2',
   storageBucket: 'react-most-wanted-3b1b2.appspot.com',
   messagingSenderId: '258373383650'
 },
 firebase_config_dev: {
   apiKey: 'AIzaSyB31cMH9nJnERC1WCWA7lQHnY08voLs-Z0',
   authDomain: 'react-most-wanted-dev.firebaseapp.com',
   databaseURL: 'https://react-most-wanted-dev.firebaseio.com',
   projectId: 'react-most-wanted-dev',
   storageBucket: 'react-most-wanted-dev.appspot.com',
   messagingSenderId: '70650394824'
 },
 firebase_providers: [
   'google.com',
   'facebook.com',
   'twitter.com',
   'github.com',
   'password',
   'phone'
 ],
 initial_state: {
   theme: 'dark',
   locale: 'en'
 },
 drawer_width: 256,
 locales,
 themes,
 grants,
 routes,
 getMenuItems,
 firebaseLoad: () => import('./firebase'),
}

export default config
We need to change the parts firebase_config and firebase_config_dev . We put there the configuration from our own prod and dev Firebase projects.
Get your Firebase configuration
To get the needed configuration from your Firebase project go to the Firebase console and enter your project. From there we go to our project settings.
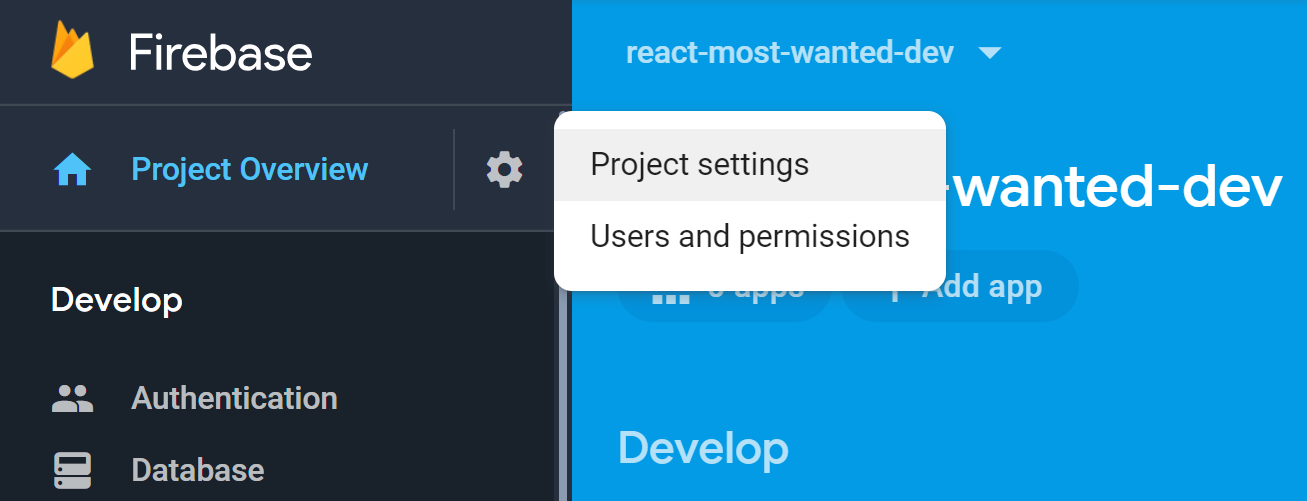
In our Firebase settings age be scroll to the bottom and click on the "Add Firebase to your web app" button.
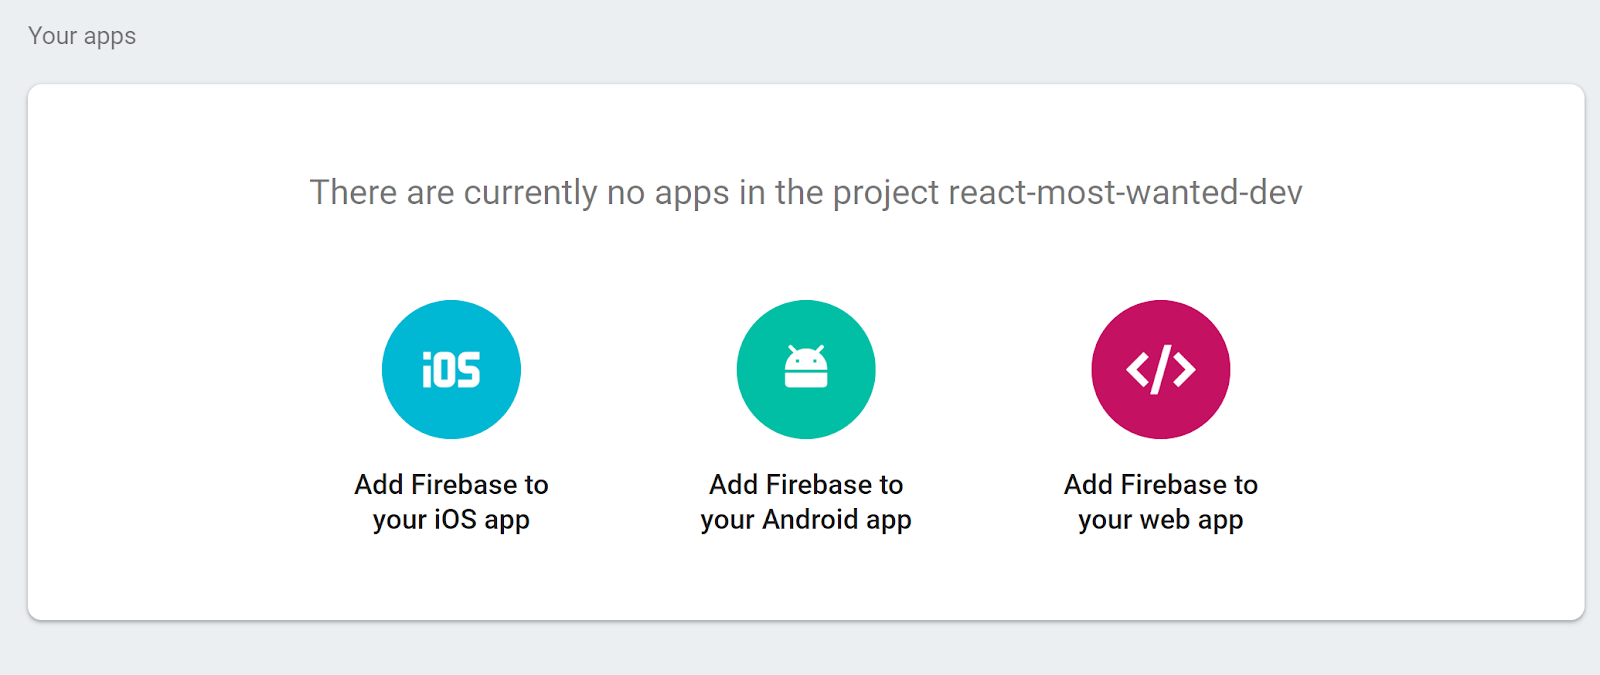
A new dialog window will open where we can copy our Firebase configuration.
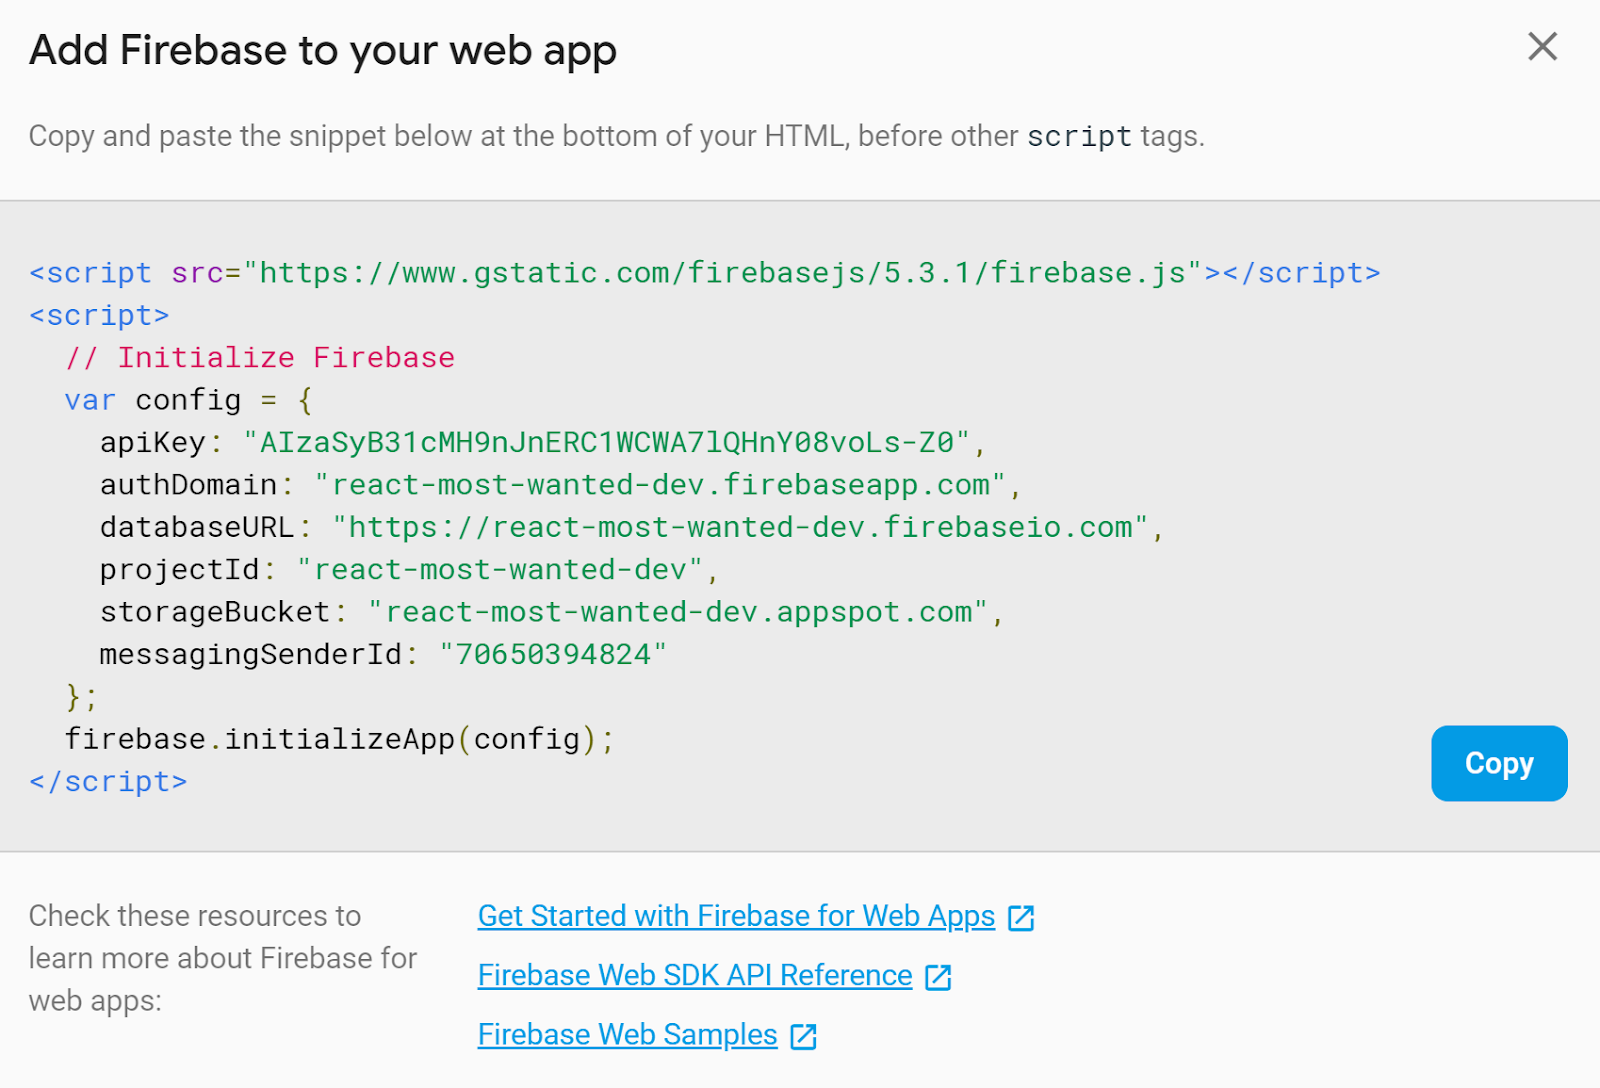
Be sure to copy only the data inside the config variable.
We do this for our production project and repeat it again with our development project. The production configs we put in the RMW template project config.js file under firebase_config and the development configs under firebase_config_dev.
Choosing our Firebase providers
Firebase gives us the possibility to authenticate to our application throughout different authentication methods. We can enable all methods we want to use over our RMW template project config file. Just add those authentication methods you want to the firebase_providers configuration.
...
 firebase_providers: [
   'google.com',
   'facebook.com',
   'twitter.com',
   'github.com',
   'password',
   'phone'
 ],
...
Setup Firebase-Tools
As shown above rmw is using separated Firebase projects for development and production environment. We already installed the Firebase tools for our CLI and logged in to Firebase. To add our own Firebase project we run this command in our project folder:
firebase use --addThis command will need some interaction with you. You will get a list of all your Firebase projects from witch you can choose which one to add to our RMW project.
test-app> firebase use --add
? Which project do you want to add? (Use arrow keys)
> dev-ugst-proplan
  ecronix-8ddd8
  fir-demo-project
  firekit-ad5a4
  gdg-freilassing
  ics-website-62864
  infinite-firebase
(Move up and down to reveal more choices)
After choosing one you will be asked to give the selected project an alias:
test-app> firebase use --add
test-app> firebase use --add
? Which project do you want to add? infinite-firebase
? What alias do you want to use for this project? (e.g. staging)
We enter here dev and press enter. Our console should show now something like this:
test-app> firebase use --add
? Which project do you want to add? infinite-firebase
? What alias do you want to use for this project? (e.g. staging) dev

Created alias dev for infinite-firebase.
Now using alias dev (infinite-firebase)
Because we are having separate dev and prod projects we need to repeat the above steps for our prod project.
firebase use --addWe again select one of our Firebase projects but now enter as alias prod:
test-app> firebase use --add
? Which project do you want to add? react-most-wanted
? What alias do you want to use for this project? (e.g. staging) prod

Created alias prod for react-most-wanted.
Now using alias prod (react-most-wanted)
test-app>
If the Firebase tools and commands in the RMW scripts don't find a prod or dev project they will use the "default" one. To add one (which I would recommend) we repeat again the same command:
firebase use --addWe again select one of our Firebase projects but now enter as alias default:
test-app> firebase use --add
? Which project do you want to add? react-most-wanted
? What alias do you want to use for this project? (e.g. staging) prod

Created alias prod for react-most-wanted.
Now using alias prod (react-most-wanted)
test-app>
If you start using the project after adding your own Firebase project and a ‘npm start' command you will notice that some things are not working properly. The number of registered users will not increase or the chat messages will not be send. The reason for that is that your project has not the required database rules and firebase functions deployed.
Chose the Firebase project
As we have seen the RMW has a development and a production Firebase project. All the steps below have to be done for each of them. To ensure you are doing the right command for the right project run this command before:
firebase use devWith that command we say to the Firebase Tools to run all project related CLI Firebase commands to the project with the alias dev. Running the same command for prod we switch the CLI to run all commands on the Firebase production project.
Prepare Firebase cloud functions config
Every project has some secret data like credentials or API Keys. We can save to our Firebase project secret data that is stored on the backend and not in the client side and not even in the source code. That way we can create open source projects like RMW without to vory if our sacred data gets published by a mistake. The published RMW version for example uses my private email to send the welcome emails to new users.
To save secret informations to our Firebase cloud functions we use this command:
firebase functions:config:set gmail.email="some@email.com" gmail.password="thePassword"
With that we have set the firebase configurations for our email credentials. With a simple command we can always see what we have saved as Firebase functions config:
firebase functions:config:getDeploy your Firebase functions
Now that we have setup our Firebase cloud functions config we can deploy all of them to our Firebase projects. To ensure that we deploy only the Firebase Cloud functions we have to run this command:
firebase deploy --only functionsAfter running this command for dev and prod we have all needed Firebase cloud functions running to make our RMW demo work properly.
RMW provides a general way to handle user authorisation (which user can do what). Those are managed over the Realtime Database and Firestore database rules. RMW has those already written for the template project to run properly. We just need to deploy them with this command:
firebase deploy --only databasefor the Realtime database and:
firebase deploy --only firestoreWARNING: The RMW demo database rules are adjusted that way that anyone can make himself Administrator. That way everyone can checkout all features.
Before deploying to production we need to change the rules to disable this behaviour.
Remove DEMO database rules behaviour
In our project under the folder "firebase" we have the file firebase.database.rules.json in which our database rules are stored. In that file we change the first part of the rules from:
{
 "rules": {
   "admins": {
     ".read": "auth != null",
     "$uid": {
       ".write": "auth != null || root.child('admins/'+auth.uid).exists()"
     }
   },
   "predefined_chat_messages": {
     ".read": "auth != null",
     "$uid": {
       ".write": "auth != null"
     }
   },
...
To:
{
 "rules": {
   "admins": {
     ".read": "auth != null",
     "$uid": {
       ".write": "root.child('admins/'+auth.uid).exists()"
     }
   },
   "predefined_chat_messages": {
     ".read": "auth != null",
     "$uid": {
       ".write": "auth != null"
     }
   },
...
After that we can deploy our database rules to have the secured version.
Everything is prepared for our first deploy. We could now run all deploy commands for dev and prod but that is in most cases no necessary. RMW has already prepared CD and CI features. You don't need to deploy everything manually. With just connecting your project github repo to Travis it is already ready for Continuous Deployment (CD).
The get everything covered we will still show how to deploy the project to our Firebase production project:
- Create the project build
npm run build
- Select Firebase project
firebase use prod
- Deploy to Firebase
firebase deploy